
You can repair your lawn after stump grinding by clearing the debris, amending the soil, and then either seeding or sodding the area. This guide will walk you through each step to bring your lawn back to its former glory.
Stump grinding is a great way to get rid of an unsightly tree stump without the back-breaking labor of digging it out. However, the process leaves behind a mess and an area of disturbed soil that needs attention. Restoring your lawn to its healthy, green state requires a few key steps. This comprehensive guide will cover everything you need to know about successful lawn repair after stump removal.
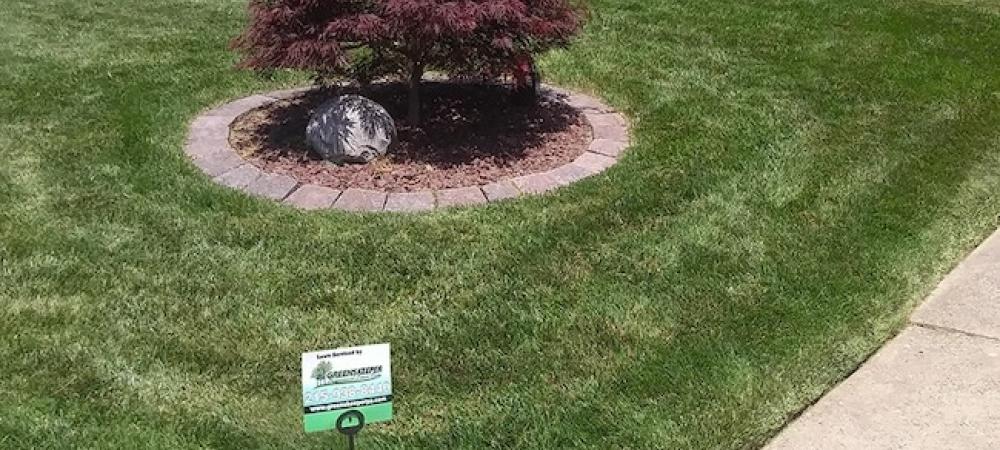
Image Source: www.greenskeeperpa.com
Preparing the Area for Lawn Repair
Once the stump grinding is complete, you’ll be left with a pile of wood chips and sawdust, often mixed with soil. This debris needs to be cleared away to allow for proper lawn repair.
Clearing the Debris
- Remove Wood Chips: The primary material left from stump grinding is wood chips. These are a mix of the stump and roots, along with soil. You can rake these chips into piles and remove them from the area.
- Separate Soil and Chips: If possible, try to separate the soil from the wood chips. The soil can be reused, while the chips have various other uses.
- Tools for Clearing: A sturdy rake, a shovel, and a wheelbarrow are essential for this task. For larger jobs, a leaf blower can help gather smaller debris.
Assessing the Damage
After clearing, you’ll see the full extent of the area that needs attention. This might include a depression where the stump was, and potentially some surrounding bare patches.
- Depth of the Hole: The depth of the hole created by the grinding process will influence how much material you need to fill it.
- Root System: While stump grinding removes the bulk of the stump, some larger roots might remain just below the surface. These can sometimes hinder new growth.
Soil Amendment: The Foundation of a Healthy Lawn
The soil in the stump grinding area is often compacted and depleted of nutrients. Proper soil amendment is crucial for establishing new grass.
Why Amend the Soil?
Stump grinding grinds the wood into small pieces and mixes it with the soil. This mixture can be problematic for new grass for a few reasons:
- Nitrogen Depletion: As wood chips decompose, they use nitrogen from the soil. This can starve newly planted grass of this essential nutrient.
- Poor Drainage: The fine sawdust and chip mixture can sometimes create a dense layer that hinders water drainage and air circulation.
- Compaction: The grinding process itself can compact the soil.
What to Use for Soil Amendment
You have several options for improving the soil:
Option 1: Removing Grinding Debris and Adding New Topsoil
This is often the most effective method for comprehensive lawn repair.
- Remove Wood Chips: Rake out as many wood chips as possible from the ground.
- Add Topsoil: Bring in fresh, high-quality topsoil. Aim for a layer of at least 4-6 inches, especially if the grinding created a deep hole.
- Mix New and Old Soil: Gently mix the new topsoil with the existing soil in the area. This helps create a consistent texture and allows for better root penetration.
Option 2: Incorporating Wood Chips Strategically
While you don’t want a thick layer of chips directly where you’re planting grass, incorporating them can be beneficial if done correctly.
- Composting: If you have a compost bin, mix the wood chips with other organic materials and let them compost for several months. The resulting compost will be rich in nutrients and a fantastic soil amendment.
- Thin Layer Mixing: For less severe grinding sites, you can mix a thin layer of wood chips into the top 4-6 inches of soil. This helps with aeration and gradual nutrient release over time. Avoid a thick layer as it can still cause nitrogen tie-up.
Option 3: Using Commercial Soil Amendments
Several products can help improve your soil:
- Compost: High-quality compost is an excellent soil amendment. It improves soil structure, adds nutrients, and helps retain moisture.
- Peat Moss: Peat moss can improve drainage and aeration, but it’s important to use it in moderation as it can become water-repellent when dry.
- Well-Rotten Manure: Aged manure is a nutrient-rich amendment that also improves soil structure.
Testing Your Soil
Before adding amendments, consider a soil test. This can tell you the pH level and nutrient content of your soil, guiding you on what specific amendments might be needed. Most garden centers offer basic soil testing kits.
Planting Your New Lawn: Seeding vs. Sodding
Once your soil is amended, it’s time to establish new grass. You have two primary methods: seeding and sodding.
Seeding Your Lawn
Seeding is generally more cost-effective and allows for a wider variety of grass types to be used, tailoring your lawn to your specific climate and conditions.
Choosing the Right Grass Seed
The success of your lawn repair heavily depends on selecting the correct grass seed.
- Climate: Choose grass types that thrive in your region’s climate (cool-season or warm-season grasses).
- Sunlight: Consider the amount of sunlight the area receives. Some grass types tolerate shade better than others.
- Traffic: If the area will see a lot of foot traffic, select a hardy, wear-resistant variety.
- Mixtures: Often, a blend of different grass species provides the best resilience against pests, diseases, and environmental stress.
The Seeding Process
- Level the Area: Rake the amended soil to create a smooth, level surface. Remove any remaining debris.
- Apply Grass Seed: Spread the grass seed evenly across the prepared area. Follow the seeding rate recommended on the seed packaging. You can use a broadcast spreader for larger areas or a drop spreader for more precise application.
- Lightly Rake: Gently rake the seeds into the top 1/4 inch of soil. This ensures good seed-to-soil contact, which is vital for germination.
- Apply Starter Fertilizer: A starter fertilizer formulated for new lawns will provide essential nutrients for seedling growth. Follow the product’s instructions for application rates.
- Water Gently and Consistently: Keep the seeded area consistently moist but not waterlogged. This usually means light watering several times a day, especially during dry periods.
- Protect the Area: If possible, consider using a thin layer of straw or a biodegradable netting to protect the seeds from birds and washing away in heavy rain.
Sodding Your Lawn
Sodding provides an instant lawn, which is appealing if you want immediate results.
When to Choose Sodding
- Quick Results: Sodding gives you a mature lawn almost immediately.
- Erosion Control: Sod is excellent for slopes or areas prone to erosion, as the turf immediately holds the soil in place.
- Established Lawn Look: If you need the repaired area to blend seamlessly with an existing, mature lawn, sod is the way to go.
The Sodding Process
- Prepare the Soil: Similar to seeding, prepare the soil by amending and leveling. Ensure good seed-to-soil contact is achieved by firming the soil.
- Lay the Sod: Begin laying the sod pieces, starting from one edge of the area. Butt the edges of the sod tightly together to avoid gaps. You may need to cut pieces to fit around irregular shapes.
- Firm the Sod: Once laid, gently walk on the sod or use a roller to press it firmly into the amended soil. This is crucial for root-to-soil contact.
- Water Thoroughly: Water the newly laid sod immediately and deeply. The goal is to moisten the soil underneath the sod.
- Water Consistently: For the first 2-3 weeks, keep the sod and the soil beneath it consistently moist. This encourages the roots to grow down into the new soil. You can gradually reduce the frequency of watering as the sod becomes established.
- Fertilize: Apply a starter fertilizer specifically designed for new sod shortly after installation.
Ongoing Maintenance for Lawn Repair Success
Once your new grass is established, proper care is key to ensuring long-term health and vigor.
Watering
- New Grass: Newly seeded or sodded areas require consistent moisture. Water lightly but frequently.
- Established Lawn: Once the grass is established (typically after 3-4 weeks), you can transition to a deeper, less frequent watering schedule to encourage deep root growth. Aim for about 1 inch of water per week, delivered in one or two watering sessions.
Fertilizing
- Starter Fertilizer: This is applied at planting time.
- Maintenance Fertilization: After the initial establishment period, follow a regular fertilizer schedule tailored to your grass type and local conditions. This usually involves feeding 2-4 times per year.
Weed Control
New grass is more susceptible to weed control issues.
- Preventative Measures: Healthy, dense turf is the best defense against weeds.
- Manual Removal: For a few weeds, pulling them by hand is effective.
- Post-Emergent Herbicides: If weeds become a significant problem, use a post-emergent herbicide formulated for your grass type. Always read and follow label instructions carefully. Be cautious applying herbicides to very young grass.
Aeration
- When to Aerate: Aeration is a process that removes small plugs of soil to reduce compaction and improve air, water, and nutrient penetration. It’s typically done on established lawns.
- Timing: For newly repaired areas, wait until the grass is well-established (usually at least a year old) before considering aeration.
Mulching Around the Perimeter
Once the lawn repair is complete, you might consider mulching around the edges of the new grass area, especially if it borders garden beds. This helps retain moisture, suppress weeds, and create a neat finish. Use organic mulches like shredded bark or wood chips (but keep them a few inches away from the grass blades to prevent rot and pest issues).
Common Issues and Troubleshooting
| Issue | Cause | Solution |
|---|---|---|
| Uneven Growth | Inconsistent watering, poor soil amendment, or uneven grass seed distribution. | Ensure consistent moisture. Check that the soil was adequately amended and level. Re-seed sparse patches if necessary, using the same grass seed type. For sod, ensure tight seams. |
| Yellowing Grass | Nutrient deficiency (often nitrogen), overwatering, or poor drainage. | Apply a balanced fertilizer suitable for new grass. Adjust watering to ensure the soil is moist but not saturated. If drainage is poor, consider aeration once the lawn is established or improving the soil structure with more soil amendment. |
| Poor Germination | Insufficient moisture, old grass seed, or poor seed-to-soil contact. | Keep the area consistently moist. Use fresh grass seed. Ensure seeds are lightly raked into the soil. |
| Weeds Dominating New Grass | Young grass is vulnerable; weed control measures were not sufficient. | Hand-pull small weeds. Once the grass is more established (at least 3-4 mowings), you can use a selective herbicide. Healthy, dense turf will outcompete most weeds. |
| Bare Patches | Not enough seed, poor seed-to-soil contact, or damage from pests/weather. | Re-seed the bare spots, ensuring good contact and consistent moisture. Identify and address the cause if it was pests or weather. |
| Sod Not Taking | Poor root-to-soil contact, inconsistent watering, or extreme heat. | Ensure sod was firmly pressed into the soil. Water diligently. Avoid laying sod during extreme heat waves. |
Frequently Asked Questions (FAQ)
Q1: How long does it take for grass to grow after stump grinding and repair?
A1: If you seed the area, you can expect to see germination within 7-14 days, and the lawn should be reasonably established within 3-4 weeks, provided you maintain consistent watering. Sodding provides an instant lawn, but it takes about 3-4 weeks for the sod to truly root and become established.
Q2: Can I plant grass seed immediately after stump grinding?
A2: It’s best to wait after stump removal and grinding. You need to clear the debris and amend the soil first. Planting directly into the sawdust and wood chip mixture will likely lead to poor results due to nitrogen depletion and poor soil structure.
Q3: How much topsoil do I need to add after stump grinding?
A3: This depends on how deep the grinding went. For a typical stump, adding 4-6 inches of good quality topsoil over the amended area is usually sufficient to create a good base for new grass.
Q4: Should I remove the wood chips from stump grinding?
A4: Yes, it’s highly recommended to remove the bulk of the wood chips from the immediate planting area. They can tie up nitrogen in the soil as they decompose, hindering new grass growth. If you can’t remove them, mix a thin layer into the top few inches of soil or let them compost first.
Q5: What is the best way to deal with exposed roots after stump grinding?
A5: While stump grinding aims to pulverize the stump and most roots, larger, shallow roots might remain. You can try to cut them flush with the soil surface using a saw or loppers. If they are too large or deep, you might need to build up the soil over them or consider a slightly different planting approach in that specific spot. For lawn repair, often a good layer of amended soil can cover smaller remaining roots.
Q6: Is aeration necessary for a newly repaired lawn?
A6: Aeration is generally not needed for newly repaired lawns. It’s a maintenance practice for established turf to combat compaction. Wait at least one year after seeding or sodding before considering aeration on the repaired area.
By following these steps, you can effectively repair your lawn after stump removal and grinding, ensuring a healthy and vibrant green space once again.