
Can you replace your lawn with gravel? Yes, you absolutely can, and it’s a fantastic way to create a low-maintenance yard that saves water and reduces your yard work significantly. This guide will walk you through everything you need to know to transform your thirsty lawn into a beautiful and practical gravel landscape.
Replacing a lawn with gravel is a smart choice for many homeowners. It offers a unique aesthetic, drastically reduces water consumption, and minimizes the need for mowing, fertilizing, and pest control. Whether you’re aiming for a modern look, embracing xeriscaping lawn principles, or simply want more free time, a gravel garden conversion is a viable and attractive solution.
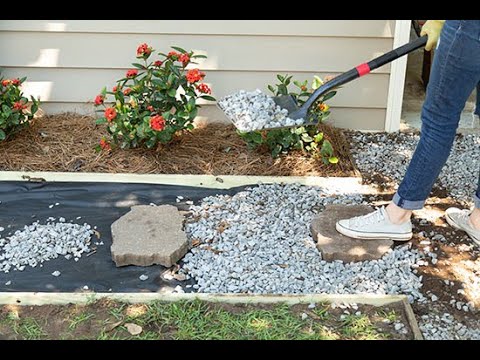
Image Source: i.ytimg.com
Why Choose Gravel Over Lawn?
Lawns require a substantial amount of resources. They need regular watering, often daily during hot months, which can be a significant cost and strain on local water supplies. Mowing is a recurring chore, and the use of fertilizers and pesticides can have environmental impacts.
Gravel, on the other hand, is a sustainable and low-maintenance alternative. Once installed, it requires minimal upkeep. It’s a key component in drought-tolerant landscaping, making it ideal for regions with water restrictions or for those looking to conserve water.
Here are some key benefits of switching to a gravel landscape:
- Water Conservation: Gravel doesn’t need watering. This is a huge advantage, especially in dry climates.
- Reduced Maintenance: Say goodbye to mowing, edging, and fertilizing your lawn.
- Cost-Effective: While there’s an initial investment, the long-term savings on water, tools, and chemicals can be substantial.
- Pest and Disease Resistance: Gravel areas are less susceptible to common lawn pests and diseases.
- Aesthetic Versatility: Gravel landscaping ideas are endless, from modern and minimalist to rustic and natural.
- Permeable Surface: Many gravel applications offer permeable paving, allowing rainwater to seep into the ground, reducing runoff and replenishing groundwater.
Planning Your Gravel Landscape
Before you grab a shovel, careful planning is crucial. This section will guide you through the essential steps to ensure a successful and beautiful gravel garden.
1. Design and Layout
Consider the overall aesthetic you want to achieve. Think about the shapes of your garden beds, pathways, and seating areas.
- Pathways: Gravel is excellent for creating inviting pathways. You can use different types of gravel for visual interest.
- Seating Areas: A gravel base can provide a stable and attractive surface for patios or seating arrangements.
- Planting Zones: Integrate plants that thrive in drier conditions. Choose plants that complement the gravel’s texture and color.
- Drainage: Observe how water flows across your property. Plan your gravel areas to avoid water pooling.
Here are some popular gravel landscaping ideas:
- Modern Minimalist: Clean lines, geometric shapes, and monochromatic gravel with architectural plants.
- Zen Garden: Raked gravel, strategically placed rocks, and drought-tolerant plants like succulents and ornamental grasses.
- Cottage Garden: Winding gravel paths through abundant, informal plantings.
- Rustic Charm: Larger, chunkier gravel with natural stone accents and native plants.
2. Choosing Your Gravel
The type of gravel you select will impact the look, feel, and function of your landscape. Consider size, color, and material.
| Gravel Type | Description | Best For |
|---|---|---|
| Pea Gravel | Small, rounded stones, typically 1/8 to 3/8 inches in diameter. | Pathways, decorative ground cover, children’s play areas. |
| Crushed Stone | Angular, crushed rocks, available in various sizes (e.g., 1/4 inch, 3/4 inch). | Driveways, pathways, base material for patios, stable surfaces. |
| River Rock | Smooth, rounded stones, often larger than pea gravel. | Dry creek beds, decorative accents, borders, complementing larger plants. |
| Decomposed Granite | Fine, sand-like material made from crushed granite. | Pathways, patios, natural look, can be stabilized. |
| Gravel Blends | Mixtures of different stone types and colors for unique visual appeal. | Decorative areas, pathways, creating specific landscape styles. |
Color Matters: Gravel comes in a wide range of colors, from pale grays and whites to earthy browns and deep reds. Consider how the gravel color will interact with your home’s exterior and existing landscaping.
3. Material Calculation
You’ll need to calculate how much gravel you need. Measure the length and width of the area you plan to cover and decide on the desired depth. A typical depth for pathways is 2-3 inches, while driveways might require 4-6 inches.
- Formula: Volume (cubic yards) = (Length (ft) x Width (ft) x Depth (in)) / 324
Always round up to ensure you have enough material, as gravel can settle.
Preparing the Site
Proper site preparation is the most critical step for a long-lasting, weed-free gravel landscape. This involves removing existing vegetation and creating a stable base.
1. Removing the Lawn
The first step is to get rid of the grass and any existing weeds. There are several methods:
- Sod Cutter: Renting a sod cutter is an efficient way to physically remove the turf layer. This method provides a clean slate quickly.
- Digging: For smaller areas, you can manually dig out the sod. It’s labor-intensive but effective.
- Sheet Mulching/Lasagna Gardening: This method involves layering organic materials (cardboard, compost, mulch) over the lawn. It takes time for the grass to decompose, but it’s an eco-friendly approach that also improves soil.
- Solarization: Covering the area with clear plastic during hot, sunny months can kill the grass and weed seeds through heat. This process takes several weeks.
2. Excavation
Once the sod is removed, you may need to excavate the area to the desired depth for your gravel and base layers. This creates a contained space and helps with drainage. Aim to excavate deep enough to accommodate your chosen gravel depth plus at least 3-4 inches for the sub-base.
- Check for Utilities: Before any digging, contact your local utility companies to mark any underground lines.
- Grade for Drainage: Ensure the excavated area has a slight slope away from your home’s foundation to prevent water issues.
3. Weed Suppression Methods
Preventing weeds is a primary concern for gravel gardens. Effective weed suppression methods are essential for a truly low-maintenance yard.
- Landscape Fabric Installation: This is the most common and effective method. A high-quality, permeable landscape fabric is laid down after excavation. It allows water to pass through but prevents weeds from growing up from the soil below.
- How to install landscape fabric:
- Lay the fabric smoothly over the prepared sub-grade, ensuring there are no wrinkles or gaps.
- Overlap seams by at least 6-8 inches to prevent weeds from pushing through.
- Secure the fabric with landscape staples, especially along edges and seams.
- Cut openings for any plants you intend to install, carefully tucking the fabric around the base of the plants.
- How to install landscape fabric:
- Geotextile Fabric: A heavier-duty option that offers excellent strength and separation properties, often used under driveways or high-traffic areas.
- Cardboard: As a more natural option, you can lay down several layers of plain cardboard (no glossy inks or tape) directly on the soil. This will decompose over time, but it provides a good initial barrier. You’ll likely need to supplement this with landscape fabric for long-term weed control.
4. Sub-base Preparation
A proper sub-base preparation is crucial for stability and drainage, especially for pathways, patios, and driveways.
- Aggregate Base: This typically consists of crushed stone or gravel that is compacted. The depth and type will vary depending on the intended use.
- Typical Sub-Base Materials:
- Crushed Gravel (e.g., ¾ inch minus): Provides a stable, interlocking base.
- Road Base: A mixture of crushed stone and aggregate fines that compacts very tightly.
- Typical Sub-Base Materials:
- Compaction: After laying the sub-base material, it must be compacted thoroughly. This can be done using a plate compactor (rentable) or a hand tamper. Compaction creates a solid, stable foundation that prevents sinking and shifting.
Installing the Gravel
Once your site is prepared and weed suppression is in place, it’s time for the main event: spreading the gravel.
1. Laying the Gravel
- Spreading: Use shovels and rakes to spread the gravel evenly over the landscape fabric. Work in sections to ensure consistent coverage.
- Depth: Aim for the desired depth, typically 2-3 inches for decorative areas and pathways. Deeper layers provide more stability and better weed suppression.
- Raking: Use a sturdy rake to level the gravel and create the desired finish. For paths, ensure the surface is smooth and even.
2. Edging for Gravel
Proper edging for gravel is essential to keep the gravel contained, prevent it from spreading into unwanted areas (like lawns or garden beds), and create a clean, finished look.
-
Materials for Edging:
- Plastic or Composite Edging: Flexible and easy to install, these are good for curved designs. They are typically buried partially in the ground.
- Metal Edging: Durable and provides a clean, crisp line. Steel or aluminum edging is a popular choice for modern designs.
- Stone or Brick Edging: Offers a more natural or formal look. These can be set in concrete for maximum stability.
- Steel Landscape Edging: Very strong and can create sharp, modern lines.
- Natural Stone Boulders: For a more rustic or natural look, larger stones can be used as borders.
- Wood (Treated or Natural): Can be used, but may have a shorter lifespan than other materials and can eventually rot or attract pests.
-
Installation Tips:
- Ensure the edging is installed at the correct height to contain the gravel.
- For most edging types, you’ll need to dig a small trench to set them in securely.
- Backfill with gravel right up to the edge to create a seamless transition.
Integrating Plants
Gravel gardens are not just about rocks; they are beautiful canvases for planting. Embracing drought-tolerant landscaping means choosing plants that can thrive with minimal watering.
1. Plant Selection
Choose plants that are well-suited to the dry, well-drained conditions that gravel provides. Many native plants are excellent choices.
- Ornamental Grasses: Provide texture, movement, and seasonal interest. Examples include Feather Reed Grass, Blue Fescue, and Switchgrass.
- Succulents and Cacti: Store water in their leaves or stems, making them incredibly drought-tolerant. Sedums, Sempervivums, and Agave are good options.
- Herbs: Many culinary herbs, like Lavender, Rosemary, Thyme, and Sage, love well-drained, sunny conditions.
- Perennials: Coneflowers, Yarrow, Coreopsis, and Sedum are hardy perennials that can handle dry spells.
- Shrubs: Dwarf Junipers, Potentilla, and some varieties of Spirea are good low-water shrub choices.
2. Planting in Gravel
When planting in a gravel garden, you’ll need to make openings in the landscape fabric.
- Cutting Openings: Carefully cut an ‘X’ or a circle in the landscape fabric where you want to plant. Pull back the fabric to create a planting hole.
- Soil Amendment: You might want to mix some compost or organic matter into the soil where you’re planting to give the plants a good start.
- Backfilling: Place the plant in the hole, backfill with soil, and water it in. Then, carefully tuck the landscape fabric back around the base of the plant, ensuring it’s snug against the stem.
- Mulching: A light layer of gravel around the base of plants can help retain moisture and suppress weeds. Be careful not to pile gravel directly against the stems, as this can cause rot.
Maintenance of Your Gravel Landscape
One of the biggest draws of a gravel garden is its low maintenance. However, some minimal upkeep will keep it looking its best.
1. Weeding
Even with landscape fabric, a few weeds might find their way through.
- Hand-Pulling: The easiest way to deal with individual weeds is to pull them by hand when they are small.
- Spot Treatment: A weed torch can be used carefully to singe weeds in the gravel paths, but be cautious not to damage the landscape fabric or surrounding plants.
- Occasional Fabric Check: Periodically check the landscape fabric for any signs of wear or tears that weeds might exploit.
2. Raking and Leveling
Over time, gravel can shift, especially in high-traffic areas.
- Raking: Use a sturdy rake to redistribute the gravel and fill in any divots or worn spots.
- Adding More Gravel: If the gravel layer becomes thin, you may need to top it up with a fresh layer.
3. Debris Removal
- Leaf Removal: Fallen leaves can be raked off the gravel. If left to decompose, they can create a hospitable environment for weeds.
- Snow Removal: Snow can typically be shoveled or blown off gravel surfaces without issue, though using a plastic shovel is advisable to avoid damaging the gravel or landscape fabric.
Is a Gravel Lawn Right for You?
A gravel garden conversion is a significant change from a traditional lawn, and it’s important to consider if it fits your lifestyle and aesthetic preferences.
Pros:
- Significant water savings.
- Drastically reduced maintenance time.
- Durable and long-lasting.
- Environmentally friendly (reduces runoff when permeable).
- Versatile design options.
Cons:
- Initial installation can be labor-intensive and costly.
- May not be suitable for play areas where children will be running or playing ball games.
- Can be difficult to remove if you change your mind later.
- Some types of gravel can get hot in direct sun.
- Can be difficult to navigate with high heels or for those with mobility issues if not properly installed with good pathways.
Frequently Asked Questions (FAQ)
Q1: Will weeds grow through my gravel?
A1: With proper landscape fabric installation and sub-base preparation, weed growth is significantly reduced. However, a few weeds may still sprout from seeds that land on top of the gravel and germinate in any organic matter that accumulates. Regular hand-pulling is usually sufficient to manage them.
Q2: How deep should the gravel layer be?
A2: For decorative areas and pathways, 2-3 inches is usually sufficient. For driveways or areas that will receive heavy foot traffic or vehicle weight, 4-6 inches is recommended, often with a stronger base material.
Q3: Can I put gravel directly over my lawn?
A3: It is highly discouraged to put gravel directly over a lawn. You must remove the grass and weeds first, then install a layer of landscape fabric and ideally a compacted sub-base to prevent weed growth and ensure stability.
Q4: Is gravel permeable?
A4: Most gravel installations are considered permeable paving because water can seep through the spaces between the stones. However, the effectiveness of permeability can be reduced if the gravel is very fine or if a non-permeable barrier is used underneath. Landscape fabric is permeable.
Q5: What are some good gravel landscaping ideas for a small yard?
A5: For small yards, consider creating a modern mosaic with different gravel colors and textures, installing a small gravel patio with a few potted plants, or creating a winding gravel path that leads to a focal point like a bird bath or a small seating area. Drought-tolerant landscaping principles work very well in compact spaces.
Q6: How do I prevent gravel from getting into my house or on my patio?
A6: Proper edging for gravel is key. Ensure your edging is installed correctly and at the right height. Also, consider having a designated transition zone, like a doormat or a small paved area, before entering your home or onto a patio from a gravel area. Regularly sweeping or blowing off gravel from pathways can also help.
Q7: Can I plant flowers in a gravel garden?
A7: Yes, you can! Many drought-tolerant landscaping plants, including flowers like coneflowers, yarrow, and coreopsis, thrive in gravel gardens. You’ll need to cut openings in the landscape fabric to plant them.
Q8: What is the best gravel for a driveway?
A8: For driveways, crushed stone or a road base material is recommended. These angular stones interlock well and provide a stable, load-bearing surface. A deeper base layer and good compaction are essential for driveways.
By following this comprehensive guide, you can successfully transition your lawn into a beautiful, functional, and incredibly low-maintenance yard with gravel. Enjoy your new, water-wise landscape!