
Wondering how to redo your grass lawn? Redoing a grass lawn typically involves removing the old grass, preparing the soil, and then establishing new turf through seeding or sodding. This guide will walk you through every step to achieve a beautiful, healthy lawn.
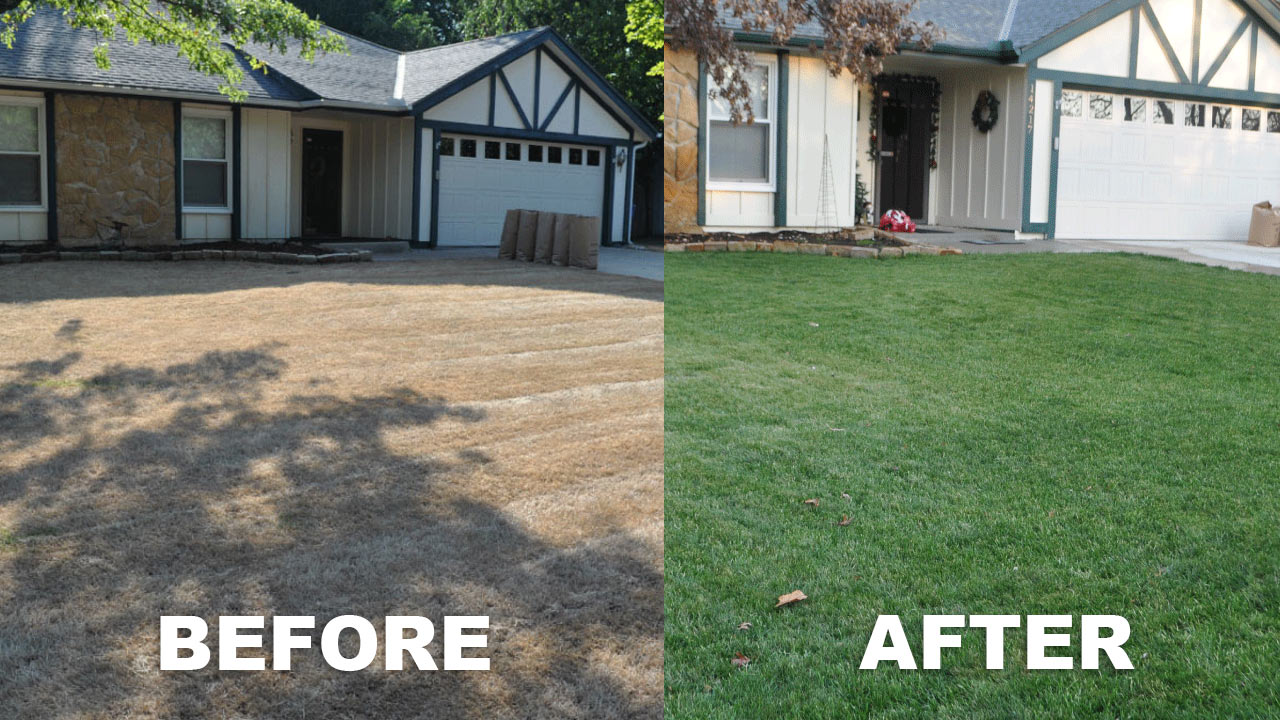
Image Source: grasspad.com
Why Redo Your Lawn?
Is your lawn looking sad, patchy, or overrun with weeds? There are many reasons you might consider a complete lawn overhaul. Perhaps your current grass type isn’t suited for your climate, or maybe it’s just reached the end of its lifespan and is struggling to thrive. Common culprits for a failing lawn include poor soil health, insect infestations, fungal diseases, or simply years of neglect. Whatever the cause, replacing grass with a fresh start can transform your outdoor space.
Common Signs Your Lawn Needs a Makeover:
- Widespread Weeds: If weeds dominate more than 50% of your lawn, it’s a strong indicator of underlying issues.
- Bare Patches: Large, persistent bare spots that don’t recover even with proper care suggest a problem with the soil or grass roots.
- Disease or Insect Damage: Visible signs of disease like brown patches, wilting, or evidence of grubs and other pests can necessitate a reset.
- Poor Grass Quality: Thin, weak grass that doesn’t green up well, even with adequate water and fertilizer, might be the wrong type for your area or have damaged roots.
- Uneven Terrain: If your lawn has significant dips and bumps that create puddles or make mowing difficult, a renovation can level it out.
- Choking Out Desired Grass: Some grass types, like crabgrass, can spread aggressively and crowd out desirable turfgrass.
Planning Your Lawn Redo
A successful lawn renovation starts with careful planning. Rushing into the process without a solid strategy can lead to wasted time and money.
Step 1: Assessing Your Current Lawn and Goals
Before you grab a shovel, take a good look at what you have and what you want.
- Identify the Problem: What exactly is wrong with your current lawn? Is it weeds, bare spots, poor growth, or a combination?
- Determine Your Goals: What kind of lawn do you envision? Lush and green for playing? Low-maintenance and drought-tolerant? A specific grass type?
- Consider Your Climate and Sunlight: What is your growing zone? How much sun does your lawn area receive throughout the day? This is crucial for grass seed selection.
- Evaluate Your Time Commitment: How much time can you realistically dedicate to lawn care each week?
Step 2: Choosing Your Method: Resodding vs. Seeding
There are two primary methods for replacing grass: resodding a lawn and overseeding a lawn (or a complete re-seeding).
Resodding a Lawn: The Fast Track to a New Lawn
Resodding a lawn involves laying down pre-grown turfgrass mats. This method offers instant results and a mature-looking lawn almost immediately.
- Pros:
- Instant visual appeal.
- Quicker establishment, allowing you to use the lawn sooner.
- Suppresses weeds effectively from the start.
- Good for immediate erosion control.
- Cons:
- Significantly more expensive than seeding.
- Requires proper soil preparation for the sod to root.
- Sod can be heavy and difficult to transport and lay.
- Sod needs careful watering immediately after installation.
Overseeding a Lawn: The Economical Approach
Overseeding a lawn involves spreading grass seed over an existing lawn. This is often done to thicken a thin lawn or introduce a better grass variety. For a complete renovation, you would first remove the old grass and then re-seed. This is also known as lawn renovation using seed.
- Pros:
- Much more cost-effective than sodding.
- Allows for a wider variety of grass types to be chosen based on specific needs.
- Can be done in stages if budget is a concern.
- Cons:
- Takes longer to establish a mature, dense lawn.
- Young seedlings are more vulnerable to weeds, pests, and drought.
- Requires diligent watering and care during the germination and establishment phases.
Step 3: Grass Seed Selection
Choosing the right grass seed is paramount for a healthy, resilient lawn. This is a critical part of grass seed selection.
Key Factors to Consider:
- Climate: Cool-season grasses (like fescues, ryegrass, and bluegrass) thrive in northern climates with cold winters and moderate summers. Warm-season grasses (like Bermuda, Zoysia, and St. Augustine) do best in the southern U.S. with hot summers and mild winters.
- Sunlight: Does your lawn get full sun, partial shade, or deep shade? Some grass types tolerate shade better than others.
- Traffic: Will your lawn endure heavy foot traffic from children or pets? Some grasses are more wear-resistant.
- Water Availability: Are you in a drought-prone area? Drought-tolerant varieties will save you water and effort.
- Desired Appearance: Do you want a fine-bladed, dense turf or a coarser, more resilient grass?
Popular Grass Types:
| Grass Type | Climate Zone | Sunlight Needs | Traffic Tolerance | Drought Tolerance | Notes |
|---|---|---|---|---|---|
| Kentucky Bluegrass | Cool Season | Full Sun | Moderate to High | Moderate | Excellent cold hardiness, beautiful blue-green hue. |
| Perennial Ryegrass | Cool Season | Full Sun/Part Shade | High | Low to Moderate | Quick germination, good for overseeding, fine texture. |
| Tall Fescue | Cool Season | Full Sun/Part Shade | High | High | Deep roots, drought tolerant, good wear resistance. |
| Fine Fescues | Cool Season | Shade Tolerant | Low to Moderate | Moderate | Ideal for shady areas, fine texture. |
| Bermuda Grass | Warm Season | Full Sun | High | High | Excellent heat and drought tolerance, aggressive growth. |
| Zoysia Grass | Warm Season | Full Sun/Part Shade | High | High | Slow to establish but very dense and wear-resistant. |
| St. Augustine | Warm Season | Part Shade | Moderate | Moderate | Shade tolerant, good for coastal areas. |
It’s often beneficial to choose a mix of grasses, especially for cool-season lawns, to provide resilience against different conditions.
Preparing the Ground: The Foundation of Success
This is arguably the most critical phase of lawn renovation. Proper preparation ensures your new grass will thrive.
Step 4: Removing the Old Lawn
You must remove the existing grass and any weeds before establishing new turf.
Methods for Removing Old Grass:
- Sod Cutter: This gasoline-powered tool cuts beneath the sod, allowing you to roll it up and remove it. It’s efficient for large areas but requires renting equipment.
- How to Use:
- Water the lawn lightly the day before to make cutting easier.
- Set the sod cutter to a depth of about 1-2 inches.
- Make consistent passes across the lawn.
- Roll up the sod strips and dispose of them or compost them.
- How to Use:
- Herbicides (Chemical Removal): This involves applying a non-selective herbicide like glyphosate to kill the existing grass and weeds.
- Process:
- Apply the herbicide according to label directions.
- Wait 7-10 days for the grass to die completely.
- Rake up the dead grass and debris.
- Caution: Ensure you use a product that breaks down in the soil so it doesn’t harm your new grass.
- Process:
- Solarization (DIY Method): This eco-friendly method uses the sun’s heat to kill grass and weeds.
- Process:
- Mow the lawn as short as possible.
- Water the area thoroughly.
- Cover the entire area with clear plastic sheeting, burying the edges to create a sealed environment.
- Leave the plastic in place for 4-6 weeks during the hottest part of the year.
- Consideration: This method can be slow and might not kill deep-rooted perennial weeds.
- Process:
Step 5: Lawn Soil Testing
Before you do anything else to the soil, it’s wise to get a lawn soil testing. This tells you what your soil is lacking and what its pH level is.
- Why Test?
- pH Level: Grass prefers a slightly acidic to neutral pH (6.0-7.0). If your soil is too acidic or too alkaline, nutrients won’t be available to the grass, no matter how much fertilizer you add.
- Nutrient Deficiencies: Soil tests reveal levels of essential nutrients like nitrogen, phosphorus, and potassium, as well as micronutrients.
- Soil Structure: While not always directly measured, the test can hint at issues like compaction or poor drainage.
- How to Test:
- Collect soil samples from several different areas of your lawn. Use a clean trowel or soil probe.
- Remove any grass or plant matter from the sample.
- Aim to collect about a cup of soil from each area.
- Mix the samples together thoroughly in a clean container.
- Send the mixed sample to your local extension office or a private lab.
- Interpreting Results: The lab will provide a report with recommendations for amendments (like lime to raise pH or sulfur to lower it) and fertilization. Follow these recommendations closely.
Step 6: Amending and Improving the Soil
Based on your soil test results and general good practice, it’s time to make the soil hospitable for new grass.
- Aeration: If your soil is compacted, aeration is essential. It creates small holes in the soil, allowing air, water, and nutrients to reach the roots.
- Tools: Core aerators are best as they pull plugs of soil out. Spike aerators can sometimes worsen compaction.
- When: Aerate in spring or fall when the grass is actively growing.
- Dethatching: If a thick layer of thatch (dead grass stems and roots) has accumulated (more than 1/2 inch), it needs to be removed. Thatch can prevent water and nutrients from reaching the soil. You can use a dethatching rake or a power dethatcher.
- Adding Topsoil or Compost: This is crucial for improving soil structure, fertility, and water retention.
- How: Spread a 2-4 inch layer of good quality topsoil or compost over the entire area.
- Why: It fills in low spots, provides nutrients, and creates a better environment for seed germination or sod rooting.
- Leveling: Use a rake to break up any large clumps of soil and to fill in any remaining low spots or smooth out high spots. You want a smooth, even surface.
- Tilling (Optional but Recommended for Seeding): For seeding, lightly till the top 4-6 inches of soil. This loosens the soil, incorporates amendments, and creates a good seedbed. If resodding a lawn, you generally don’t need to till deeply, as the sod needs a firm base, but incorporating compost into the top inch is beneficial.
Step 7: Preparing for Seeding or Sodding
This is the final step before planting.
For Seeding: Preparing a Lawn for Seeding
- Fine-Tuning the Surface: Rake the surface to create a fine, loose texture. Remove any rocks, debris, or remaining dead grass.
- Lightly Compact: Walk over the prepared area or use a roller to firm the soil slightly. This removes air pockets and ensures good seed-to-soil contact.
- Fertilize (Starter Fertilizer): Apply a starter fertilizer. These fertilizers are designed to promote root development in new grass. Look for a product with a higher phosphorus content (the middle number on the N-P-K ratio). Follow the recommended application rates carefully.
For Sodding: Preparing for Sod Installation
- Smooth Surface: Ensure the soil is smooth and level. The sod will conform to the contours of the soil, so any bumps or dips will be evident in the finished lawn.
- Moisten the Soil: Lightly moisten the prepared soil just before laying the sod. This helps the sod establish roots more quickly.
Establishing the New Lawn
Now comes the exciting part – bringing your new lawn to life!
Step 8: Installing the New Turf
Whether you’re seeding or sodding, proper installation is key.
Seeding Process:
- Spreading the Seed:
- By Hand: For smaller areas, you can spread the seed evenly by hand.
- Spreader: Use a broadcast spreader for larger lawns. Calibrate it according to the seed package instructions to ensure even coverage.
- Mixing: If using a mix of seed types, ensure they are well-blended before spreading.
- Coverage: Follow the recommended seeding rate on the package. Over-seeding too heavily can lead to competition and weak growth; under-seeding will result in a thin lawn.
- Incorporating the Seed:
- Lightly rake the seeded area to work the seeds into the top 1/4 inch of soil. This improves germination rates.
- You can also lightly roll the area again to ensure good seed-to-soil contact.
- Mulching (Optional but Recommended): A thin layer of straw or specialized seed mulch can help retain moisture and protect the seeds from birds and washing away. Use about 1-2 bales per 1000 sq ft.
Sod Installation:
- Laying the Sod:
- Start along a straight edge, such as a driveway or walkway.
- Lay the sod strips tightly together, but without overlapping. Stagger the seams like brickwork to prevent gaps.
- Use a sharp knife or saw to cut the sod to fit around curves and obstacles.
- Ensure the roots of the sod are in contact with the prepared soil.
- Tamping or Rolling: After laying, lightly tamp or roll the sod to ensure good contact with the soil. This is crucial for root establishment.
- Watering Immediately: This is one of the most critical steps for watering new sod. Water the newly laid sod thoroughly until the soil beneath is moist.
Step 9: Watering and Care for New Grass
Proper watering is essential for both seed germination and sod establishment. This phase requires patience and consistent attention.
Watering New Seed:
- Frequent, Light Watering: For the first 2-3 weeks, keep the seedbed consistently moist but not waterlogged. This means watering lightly 2-4 times a day, especially during warm, dry weather.
- As Grass Grows: Once seedlings are about an inch tall, you can gradually reduce the frequency of watering but increase the duration. Aim to water deeply and less often to encourage roots to grow deeper.
- Avoid Runoff: If water starts to run off, you’re watering too much at once. Allow the soil to absorb the water before watering again.
Watering New Sod:
- Deep and Frequent: Watering new sod is critical for its survival. Water it thoroughly immediately after installation.
- First Few Days: Keep the sod constantly moist. Water multiple times a day if necessary, especially in hot or windy conditions. You should be able to lift a corner of the sod and see damp soil underneath.
- First 2-3 Weeks: Continue watering deeply every day or two, depending on weather. The goal is to keep the soil consistently moist.
- Testing for Rooting: You can test if the sod has rooted by trying to lift a corner. If it resists and stays in place, the roots are starting to establish.
- Transition to Mature Watering: Once the sod is well-rooted (usually after 2-3 weeks), you can transition to a less frequent, deeper watering schedule, similar to a mature lawn.
Step 10: Fertilizing a New Lawn
Fertilizing a new lawn requires a different approach than a mature one.
For Seeded Lawns:
- Starter Fertilizer: You applied a starter fertilizer during the preparation phase.
- First Mowing: Wait until the grass is about 1/3 taller than your mower blade (usually around 3-4 inches).
- First Feeding (After First Mowing): Once the lawn has been mowed a couple of times, you can apply a balanced fertilizer (e.g., 10-10-10) at a reduced rate. This helps the grass fill in. Follow the product label for application rates.
For Sodded Lawns:
- Initial Fertilization: The sod may have been fertilized by the grower. Often, you don’t need to fertilize immediately.
- First Feeding (2-4 Weeks Post-Installation): Once the sod has visibly started to root and you’ve mowed it a time or two, you can apply a starter fertilizer or a balanced lawn fertilizer at a light rate to encourage further growth and density.
Step 11: Mowing the New Lawn
Mowing at the right time and height is important for the health of your new grass.
Mowing Seeded Lawns:
- First Mowing: Wait until the grass reaches about 3 to 4 inches in height.
- Blade Height: Always mow high. This means removing no more than one-third of the grass blade at any one time. For most grass types, a height of 3 to 3.5 inches is ideal.
- Sharp Mower Blades: Ensure your mower blades are sharp. Dull blades tear the grass, leaving it susceptible to disease.
- Mulch Clippings: Leave the clippings on the lawn unless they are excessively long or clumping. They return valuable nutrients to the soil.
Mowing Sodded Lawns:
- First Mowing: Wait until the sod has rooted sufficiently and you’ve mowed it a time or two.
- Blade Height: Mow at the recommended height for your grass type, again removing no more than one-third of the blade at a time.
Ongoing Maintenance for a Healthy Lawn
Once your new lawn is established, consistent care will keep it looking its best.
Fertilization Schedule
Follow a regular fertilization schedule based on your grass type and local recommendations. This usually involves a few applications per year.
Weed Control
Address weeds as they appear. Early detection and removal are key. Spot treatments with herbicides or manual removal can be effective.
Pest and Disease Management
Monitor your lawn for signs of pests or diseases. Healthy lawns are more resistant, but sometimes intervention is necessary.
Watering Mature Lawns
Water deeply and infrequently to encourage deep root growth. The exact amount and frequency will depend on your climate, soil type, and grass variety.
Aeration and Dethatching (As Needed)
Periodically aerate and dethatch your lawn (usually every 1-3 years) to prevent compaction and thatch buildup, ensuring continued health.
Frequently Asked Questions (FAQ)
Q1: How long does it take for a newly seeded lawn to look good?
A1: Depending on the grass type and growing conditions, you’ll see germination in 5-14 days. A reasonably dense lawn can be achieved in 4-6 weeks, but it will continue to fill in and mature over the first year.
Q2: When is the best time to redo a grass lawn?
A2: The best time depends on your grass type. For cool-season grasses, fall (late August to October) is ideal. For warm-season grasses, late spring or early summer is best. Avoid doing this during extreme heat or drought.
Q3: Can I add a new lawn over an old, dead lawn without removing it?
A3: While some people attempt to just overseed a lawn without removal, for a complete redo, it’s strongly recommended to remove the old turf. This ensures the new grass has a good seedbed and isn’t competing with dead material and underlying weed seeds.
Q4: How much does it cost to redo a lawn?
A4: Costs vary significantly. Resodding a lawn can cost $1.00-$2.00 per square foot, while seeding might cost $0.10-$0.30 per square foot for seeds and soil amendments. Labor costs will add to this if you hire professionals.
Q5: My new sod looks yellow. What should I do?
A5: Yellowing sod can be due to several reasons: insufficient watering, overwatering, or a lack of nutrients. Ensure you are watering new sod correctly, keeping the soil consistently moist. If watering is adequate, a light application of a nitrogen-rich fertilizer might be needed after the sod has rooted.
By following these comprehensive steps, you can successfully redo your grass lawn and enjoy a beautiful, healthy landscape for years to come. Remember, patience and consistent care are the keys to a thriving lawn.