
Can I get worms for my garden easily? Yes, you absolutely can get worms for your garden easily through various methods, including purchasing them online or from local suppliers, or even by attracting them to your existing garden.
Worms are the unsung heroes of a healthy garden. They are nature’s tiny tillers, tirelessly working to improve your garden soil and transform kitchen scraps into rich organic fertilizer. If you’re looking to boost your garden’s fertility, improve drainage, and create a more vibrant ecosystem, then raising worms is an excellent endeavor. This guide will walk you through the easiest and most effective ways to acquire the wriggly workers your garden needs.
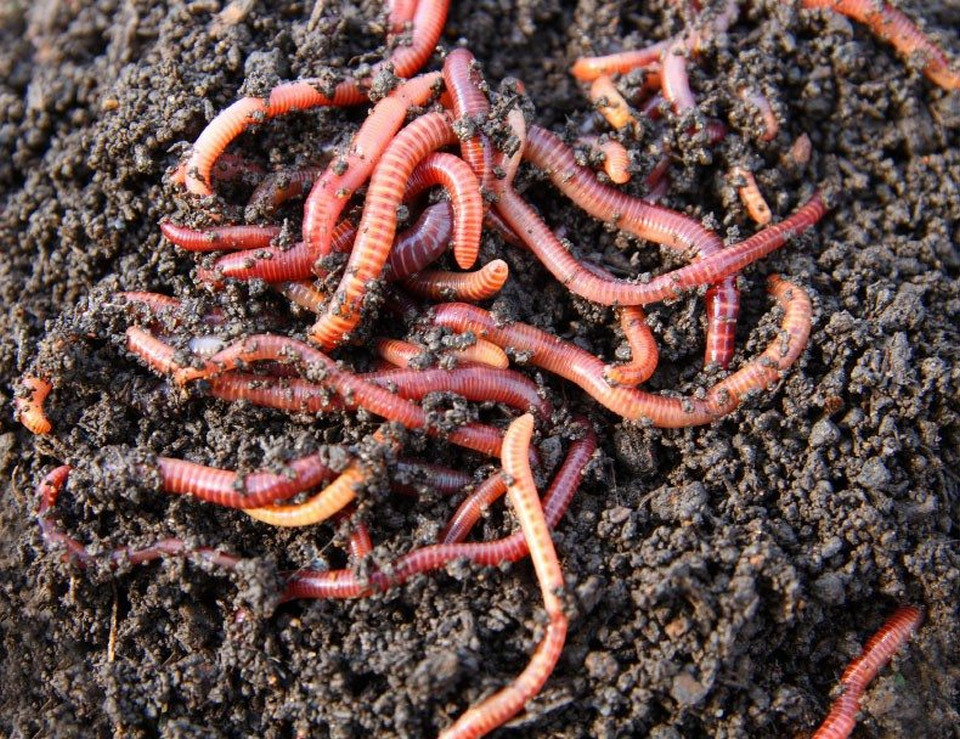
Image Source: seedmoney.org
Why Your Garden Needs Worms
Before we dive into obtaining these beneficial creatures, let’s briefly touch on why they are so crucial for your garden’s well-being. Worms, particularly earthworms, play a vital role in several key areas:
- Soil Aeration: As worms burrow through the soil, they create channels that allow air and water to penetrate more deeply, preventing compaction and promoting healthy root growth.
- Nutrient Cycling: Worms consume organic matter and excrete nutrient-rich castings. These worm castings are a potent soil amendment that provides essential nutrients in a form readily available to plants.
- Improved Soil Structure: The constant movement and excretions of worms break down soil particles, creating a crumbly, well-aerated structure that improves drainage and water retention.
- Disease Suppression: Healthy soil, enriched by worm activity, can help suppress plant diseases and deter pests.
Where to Find Worms for Your Garden
Getting worms for your garden doesn’t have to be complicated. There are several reliable sources, each with its own advantages.
1. Purchasing Worms Online
This is arguably the easiest and most convenient method for acquiring a specific type of worm for vermicomposting. Online retailers specialize in selling live compost worms, ensuring they are healthy and ready for their new home.
Popular Online Worm Retailers:
- Specialty Worm Farms: Many businesses focus solely on breeding and selling worms for vermicomposting and fishing bait. They often offer various species and quantities.
- Gardening Supply Websites: Larger online gardening stores sometimes carry live worms, especially during the warmer months.
- Marketplaces: Platforms like Amazon and eBay also have sellers offering live worms, but it’s crucial to check seller reviews and shipping policies carefully.
What to Look For When Buying Online:
- Species: For vermicomposting, you’ll want to specifically look for compost worms like Red wigglers (Eisenia fetida) or European nightcrawlers. These species are voracious eaters and reproduce quickly in captivity. Standard earthworms found in your garden are not typically ideal for indoor vermicomposting bins.
- Quantity: Worms are usually sold by weight (e.g., 1/4 lb, 1/2 lb, 1 lb). A good starting point for a small vermicomposting bin is about 1/4 to 1/2 pound of worms.
- Shipping: Ensure the seller offers expedited shipping or shipping that is timed to avoid extreme temperatures. Worms are living creatures and can die if exposed to excessive heat or cold during transit. Look for insulated packaging.
- Reputation: Always check seller reviews and ratings to ensure you’re buying from a reputable source that provides healthy, live worms.
2. Local Bait Shops or Garden Centers
Your local bait shop is a treasure trove for earthworms, particularly if you’re looking for worms to add directly to your garden soil or for fishing.
- Bait Shops: These shops typically sell worms like Red wigglers, European nightcrawlers, and even dew worms, which are larger earthworms often used as bait. They are accustomed to handling and transporting live worms.
- Garden Centers: Some larger garden centers may carry live worms, especially those focused on organic gardening or vermicomposting supplies.
Advantages of Buying Locally:
- Reduced Shipping Stress: Worms have a shorter journey, minimizing stress and the risk of death during transit.
- Immediate Availability: You can often pick up worms the same day you need them.
- Expert Advice: Local shop owners can often provide valuable advice on the best worm species for your needs and how to care for them.
3. Harvesting Worms from Your Own Garden
If you already have a healthy garden with good garden soil, you might be able to harvest some worms yourself. This is a free method, but it requires patience and a gentle touch.
How to Harvest Worms:
- Location: Look for areas in your garden that are rich in organic matter and consistently moist. This could be under compost piles, in shady, damp corners, or beneath rotting logs.
- Gentle Excavation: Dig a small, shallow hole with your hands or a trowel. Gently sift through the soil. Avoid aggressive digging, as you could injure the worms.
- Attracting Worms: You can attract worms to a specific area by burying kitchen scraps (like vegetable peelings and coffee grounds) or a layer of compost in a designated spot. Cover this with a damp cardboard or burlap sack. Check the area after a few days or weeks.
- What to Collect: You are looking for earthworms, which are typically larger and have a more pointed tail than compost worms like Red wigglers. If you intend to start vermicomposting, it’s generally better to purchase Red wigglers, as they are more efficient at breaking down food scraps in a confined space.
Considerations for Harvesting:
- Sustainability: Be mindful not to over-harvest. You want to leave enough worms in your garden to continue their beneficial work.
- Species Identification: Ensure you are collecting the right types of worms for your intended purpose.
4. Setting Up a Worm Farm (Vermicomposting)
Creating your own vermicomposting system is a fantastic way to continuously produce compost worms and, in turn, generate a steady supply of worm castings for your garden. This is how you can achieve long-term, easy access to worms.
Basic Worm Farm Setup:
- Container: A plastic bin with a lid is common. Drill ventilation holes in the sides and bottom for air circulation and drainage. A depth of 8-12 inches is usually sufficient.
- Bedding: The worms need a comfortable place to live. Shredded newspaper, cardboard, coconut coir, or dried leaves make excellent bedding. Moisten the bedding until it’s damp like a wrung-out sponge.
- Worms: Once your bin is set up with bedding, you can add your purchased worms.
- Food: Start by adding small amounts of feeding worms appropriate food scraps like vegetable peels, fruit scraps (avoid citrus and onions in large quantities), coffee grounds, and tea bags.
Worm Food Preferences:
Worms are not picky eaters, but some foods are better than others. Here’s a quick guide:
| Recommended Foods | Foods to Avoid or Limit |
|---|---|
| Vegetable scraps | Meat and dairy products |
| Fruit scraps | Oily foods |
| Coffee grounds and filters | Citrus (in large amounts) |
| Tea bags | Onions and garlic |
| Eggshells (crushed) | Processed foods |
| Stale bread | Spicy foods |
| Cereal |
Feeding Worms in Your Bin:
Start by adding food scraps to one side of the bin. As the worms consume the food and move to that side, you can add new food scraps to the other side. This encourages them to migrate and makes harvesting worm castings easier.
Raising worms in a vermicomposting system is a rewarding experience that provides you with a sustainable source of compost worms and a continuous supply of valuable organic fertilizer.
Types of Worms You’ll Want to Consider
Not all worms are created equal when it comes to gardening and vermicomposting. The two main categories you’ll encounter are earthworms and compost worms.
1. Earthworms
These are the common worms found naturally in your garden soil. They are often larger than compost worms and play a crucial role in natural soil ecosystems.
- Common Species: Nightcrawlers (Lumbricus terrestris) and common field worms.
- Role in Garden: They burrow deeply, aerating the soil and mixing organic matter from the surface into deeper layers.
- Suitability for Vermicomposting: Generally not ideal for vermicomposting bins. They are less efficient at breaking down food scraps in a confined environment and can sometimes try to escape.
2. Compost Worms
These are the stars of the vermicomposting show. They are smaller, reproduce rapidly, and are highly efficient at consuming organic waste.
- Red Wigglers (Eisenia fetida): These are the most popular and widely recommended compost worms. They are prolific breeders and voracious eaters, making them perfect for vermicomposting. They are reddish-brown and have distinct bands around their bodies.
- European Nightcrawlers (Eisenia hortensis): Also known as dendrobaena, these worms are larger than Red wigglers but still excellent for vermicomposting. They are also popular as fishing bait.
- African Nightcrawlers (Eudrilus eugeniae): These are larger and faster-growing than Red wigglers, but they prefer warmer temperatures and can be more sensitive to environmental changes. They are a good option for warmer climates or heated vermicomposting setups.
For ease of getting worms specifically for your garden’s benefit, particularly through a managed system like vermicomposting, focusing on Red wigglers or European nightcrawlers is your best bet.
Methods for Introducing Worms to Your Garden
Once you have your worms, you can introduce them to your garden in a few ways.
1. Direct Introduction to Garden Beds
If your goal is to enrich existing garden soil, you can directly introduce earthworms or compost worms to your garden beds.
Steps:
- Prepare the Soil: Loosen the soil in the area where you want to introduce the worms. Mix in some compost or aged manure to provide an initial food source.
- Choose a Damp Spot: Introduce worms on a cloudy day or in the late afternoon when the sun is less intense, and the soil is moist.
- Gently Place Worms: Open the container and gently place the worms on the soil surface.
- Cover and Water: Lightly cover the worms with a thin layer of soil or compost. Water the area gently to help them settle in and encourage them to burrow.
- Mulch: Applying a layer of mulch (like straw or shredded leaves) will help retain moisture and provide additional food and habitat for the worms.
2. Using Worm Castings as a Soil Amendment
The most efficient way to benefit from raising worms is by using their worm castings. You can buy castings or produce them yourself through vermicomposting.
How to Use Worm Castings:
- Top Dressing: Sprinkle a thin layer of worm castings around the base of plants. The nutrients will be washed into the soil with watering.
- Mixing into Soil: When planting new seedlings or starting seeds, mix worm castings into your potting mix or the planting hole.
- Worm Tea: Steep worm castings in water for 24-48 hours to create a liquid fertilizer called “worm tea.” This is a potent, readily absorbed nutrient boost for your plants.
3. Creating a Dedicated Worm Habitat
If you have a specific area in your garden that you want to enhance, you can create a more targeted worm habitat.
Creating a Habitat:
- Compost Piles: Bury kitchen scraps and garden waste in a designated corner of your garden to create a natural worm buffet. Over time, the worms will colonize this area.
- Under Mulch: Create layers of organic material like shredded leaves, grass clippings, and compost under a thick layer of mulch. This provides a cool, moist, and food-rich environment for worms.
Maintaining a Healthy Worm Population
Whether you’re raising worms in a bin or encouraging them in your garden, a little care goes a long way.
1. Providing Food and Moisture
- Feeding: Regularly add appropriate food scraps to your vermicomposting bin. Avoid overfeeding, which can lead to odors and anaerobic conditions.
- Moisture: Worms need a moist environment, but not a wet one. The bedding should feel like a wrung-out sponge. If it’s too dry, mist it with water. If it’s too wet, add more dry bedding material.
2. Temperature Control
- Ideal Range: Most compost worms, especially Red wigglers, thrive in temperatures between 55-77°F (13-25°C).
- Extreme Temperatures: Protect your worm bin from freezing temperatures in winter and excessive heat in summer. You may need to move indoor bins or insulate outdoor bins.
3. Aeration and Bedding Management
- Aeration: Gently fluff the bedding material in your worm bin periodically to ensure good airflow.
- Bedding: As the worms consume food and bedding, you’ll need to add more bedding material to maintain a healthy environment.
Troubleshooting Common Worm Issues
Even with the best intentions, you might encounter a few hiccups.
Odors in the Worm Bin
- Cause: Usually due to overfeeding, lack of aeration, or the presence of anaerobic conditions (too wet).
- Solution: Stop feeding for a few days. Gently aerate the bedding. Add more dry bedding material to absorb excess moisture. Ensure you are not adding forbidden foods like meat or dairy.
Worms Trying to Escape
- Cause: The bin might be too wet, too dry, the food is too acidic or alkaline, or the worms are not getting enough air.
- Solution: Check moisture levels and adjust. Ensure proper aeration. Bury food scraps under the bedding to encourage them to stay put. If it’s a new bin, give them a week to acclimate.
Slow Worm Activity
- Cause: Temperatures are too low or too high. The food source might be depleted or unsuitable.
- Solution: Adjust temperatures to the ideal range. Add fresh, appropriate food scraps.
Frequently Asked Questions (FAQ)
Q1: What is the best type of worm for my garden?
A1: For actively improving your garden soil structure and aeration naturally, native earthworms are ideal. If you want to create organic fertilizer through vermicomposting, Red wigglers are the most recommended compost worms.
Q2: Can I just put any worms I find in my garden into a vermicomposting bin?
A2: While you can try, it’s generally not recommended. Compost worms like Red wigglers are specifically adapted to breaking down food scraps in a confined vermicomposting system. Wild earthworms may not thrive and could try to escape.
Q3: How many worms do I need to start vermicomposting?
A3: A common starting point is about 1/4 to 1/2 pound of compost worms for a small to medium-sized bin. This population will grow over time as they reproduce.
Q4: How often should I feed my worms?
A4: This depends on the size of your worm population and the bin. Generally, feed them every 1-2 weeks. Observe their consumption; if food is still present from the last feeding, wait a bit longer.
Q5: What is worm casting?
A5: Worm casting is the term for the excrement of earthworms. It’s a highly nutrient-rich material that acts as a superb soil amendment and natural organic fertilizer.
By following these guidelines, you can easily acquire and care for worms, transforming your garden into a more fertile and thriving ecosystem. Happy worm wrangling!