
Image Source: i.ytimg.com
Zero Turn Blade Change: How To Do It Safely
Can you change lawn mower blades on a zero turn yourself? Yes, you absolutely can! Changing the blades on your zero turn mower is a manageable DIY task that can save you money and keep your lawn looking its best. This guide will walk you through the entire process of zero turn mower blade replacement, ensuring you can remove zero turn mower blades and install new mower blades zero turn safely and effectively. We’ll cover everything from gathering your tools to the final checks, making this your go-to resource for zero turn mower blade maintenance.
Preparing for Your Zero Turn Mower Blade Replacement
Before you even think about reaching for a wrench, proper preparation is key to a safe and successful zero turn mower blade change. This section focuses on gathering the right equipment and ensuring a secure workspace.
Essential Tools and Supplies for a DIY Zero Turn Mower Blade Change
To successfully replace your zero turn mower blades, you’ll need a few key items. Having everything ready beforehand will make the process smoother and faster.
- New Mower Blades: Ensure you have the correct replacement blades for your specific zero turn mower model. Check your owner’s manual or the manufacturer’s website for the exact part numbers. Using the wrong blades can damage your mower or result in poor cutting performance.
- Socket Wrench Set: You’ll need a socket wrench with appropriate sizes for the blade mounting bolts. Typically, a 15/16-inch or 5/8-inch socket is common, but sizes can vary.
- Torque Wrench: This is crucial for tightening the new blades to the correct specification. Overtightening or undertightening can lead to problems.
- Gloves: Heavy-duty work gloves are essential for protecting your hands from sharp blades and grease.
- Safety Glasses: Always wear safety glasses to protect your eyes from flying debris.
- Wheel Chocks: To prevent the mower from rolling, especially if working on a slight incline.
- Block of Wood: A sturdy block of wood (around 2×4 or 4×4) is needed to prop up the deck securely.
- Wire Brush: For cleaning any rust or debris from the blade mounting hardware.
- Penetrating Oil (Optional): If bolts are seized, a penetrating oil can help loosen them.
- Blade Balancer (Optional but Recommended): To ensure the blades are balanced after sharpening or replacement, which prevents vibration.
Setting Up Your Workspace for Safe Blade Removal
Choosing the right location is paramount for safely performing a DIY zero turn mower blade change.
- Level Surface: Always work on a flat, level surface. This prevents the mower from shifting or rolling. Avoid working on hills or inclines.
- Clear Area: Ensure the area around the mower is clear of people, pets, and any unnecessary objects. You don’t want any distractions or tripping hazards.
- Good Lighting: Adequate lighting is important to see what you’re doing clearly, especially under the mower deck.
- Engine Off and Cool: Make sure the mower engine is completely off and has had time to cool down. Hot engine components can cause burns.
Step-by-Step Guide to Safely Change Mower Blades on a Zero Turn
Now that you’re prepared, let’s dive into the process of how to change lawn mower blades on a zero turn. This detailed walkthrough will cover each crucial step to ensure a safe and efficient zero turn mower blade installation.
Step 1: Securing the Zero Turn Mower
Safety starts with immobilization. This is the most critical step to prevent any accidental movement during the blade change.
- Engage Parking Brake: Ensure the parking brake is firmly engaged.
- Lower Mower Deck: Bring the mower deck down to its lowest setting.
- Chock the Wheels: Place wheel chocks firmly against the front and rear tires on both sides of the mower. This adds an extra layer of security.
Step 2: Accessing the Mower Deck
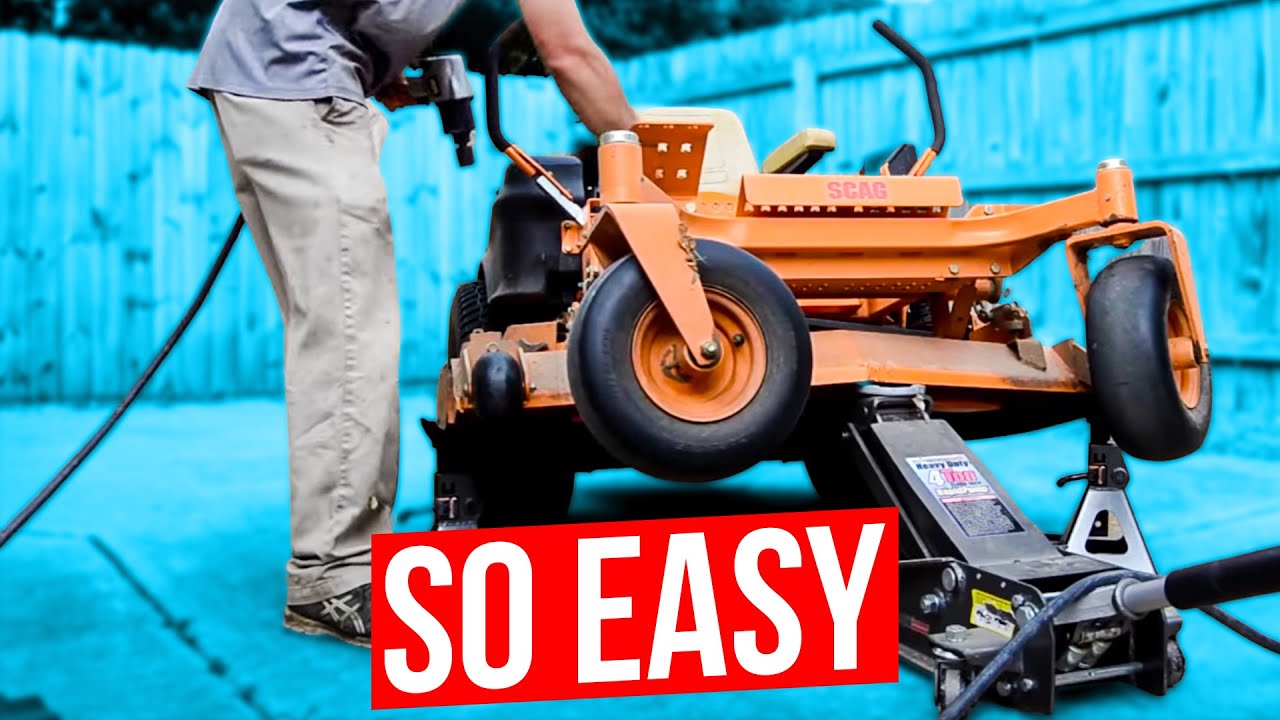
Getting to the blades requires safely lifting and supporting the mower deck.
- Lower the Deck: Ensure the mower deck is in its lowest position.
- Prop the Deck: Carefully place a sturdy block of wood under the mower deck. Position it in a way that provides stable support without obstructing the blades. Some operators prefer to lift the deck slightly with a jack or lift before placing the block. The goal is to firmly support the deck while keeping the blades accessible.
- Verify Stability: Gently try to rock the mower to ensure the deck is stable and won’t fall.
Step 3: Removing Zero Turn Mower Blades
This is where you’ll be dealing with sharp objects, so proceed with extreme caution.
- Wear Gloves and Safety Glasses: Double-check that your protective gear is on.
- Locate the Blade Mounting Bolt: Each blade is held in place by a central bolt.
- Stabilize the Blade: You might need to prevent the blade from spinning as you loosen the bolt. Some mower decks have a spindle wrench slot, or you can use a second wrench or a piece of wood to hold the blade steady.
- Loosen the Bolt: Using your socket wrench, turn the bolt counter-clockwise to loosen it. These bolts can be very tight. If it’s stuck, a penetrating oil might be helpful. Allow it to soak for a few minutes.
- Remove the Bolt: Once loosened, unscrew the bolt completely by hand.
- Remove the Blade: Carefully slide the old blade off the spindle shaft. Note the orientation of the blade, as the new one needs to be installed the same way. Blades are typically curved, with the high point of the curve facing upwards towards the mower deck.
Step 4: Inspecting Spindles and Deck
While the blades are off, it’s a good opportunity for a quick inspection.
- Check Spindle Shaft: Look for any signs of damage, excessive wear, or bending on the spindle shaft where the blade attaches.
- Inspect Blade Mount: Ensure the mounting hole on the spindle is clean and not damaged.
- Clean the Deck: Use your wire brush to clean away any grass clippings, dirt, or rust from the underside of the mower deck, especially around the blade mounting areas. This ensures a clean surface for the new blades.
Step 5: Installing New Mower Blades Zero Turn
This is the reverse of removal, but precision is key.
- Orient the New Blade: Determine the correct orientation of the new blade. The “lift” or curved portion of the blade should generally face upwards towards the mower deck. Your owner’s manual will confirm the exact orientation for your model.
- Place the Blade on the Spindle: Carefully slide the new blade onto the spindle shaft, ensuring the mounting holes align.
- Reinstall the Mounting Bolt: Thread the mounting bolt back into the spindle.
- Tighten the Bolt (Initial Tightening): Hand-tighten the bolt first to ensure it’s properly seated.
- Torque the Bolt: Use your torque wrench to tighten the bolt to the manufacturer’s specified torque. Refer to your owner’s manual for the exact torque setting. This is crucial for preventing the blade from coming loose during operation. Overtightening can strip the threads or damage the spindle.
- Repeat for Other Blades: Repeat steps 3 through 5 for each blade on the mower.
Step 6: Balancing Your Mower Blades (Optional but Recommended)
Properly balanced blades are essential for a smooth cut and to prevent excessive vibration that can damage your mower.
- Using a Blade Balancer: Place the center hole of the blade onto the spindle of a blade balancer. If one side of the blade drops faster than the other, it’s out of balance.
- Adjusting Balance: To correct imbalance, you can either grind a small amount of metal from the heavier side or add a small amount of weight (like a washer) to the lighter side. Be cautious not to remove too much material if grinding.
- Re-check Balance: After making adjustments, re-check the balance until the blade remains level.
Step 7: Final Checks and Lowering the Deck
Before you start mowing, a few final checks are necessary.
- Double-Check Tightness: Ensure all blade mounting bolts are torqued correctly.
- Remove Tools and Debris: Clear away all tools, wheel chocks, and any loose debris from under the deck and around the mower.
- Lower the Deck: Carefully remove the block of wood supporting the deck. Lower the mower deck gently and smoothly to the ground.
- Inspect Again: Take one last look under the mower to confirm everything is in place and there are no foreign objects near the blades.
How to Sharpen Mower Blades Zero Turn
While replacing blades is straightforward, maintaining their sharpness is equally important for lawn health and mower efficiency. Here’s how to sharpen your zero turn mower blades.
When to Sharpen Your Blades
- Visible Dullness: If the tips of the grass blades are frayed or torn rather than cleanly cut.
- Uneven Cut: If you notice patches or lines of uncut or unevenly cut grass.
- Bending or Nicks: If blades have significant nicks, bends, or are otherwise damaged.
- Regular Maintenance: It’s generally recommended to sharpen blades at least once or twice per mowing season, depending on your lawn size and conditions.
The Sharpening Process
- Remove Blades: Follow the steps outlined earlier to safely remove the mower blades.
- Clean the Blades: Use a wire brush to remove all dirt, grass, and debris from the blades.
- Identify the Cutting Edge: Locate the beveled edge of the blade.
- Sharpening Tools: You can use a metal file, a bench grinder with a grinding wheel, or a dedicated blade sharpening attachment for a drill. A file is often the safest for DIYers.
- Filing Technique:
- Place the blade in a vise, securing it firmly but not so tightly that you deform it.
- Align your file with the original bevel angle of the blade. This angle is typically around 30-45 degrees.
- Use long, smooth strokes in one direction, moving from the heel of the blade towards the tip.
- Apply moderate pressure. Avoid overheating the blade, which can temper the steel.
- Sharpen both sides of the blade to the same angle and degree.
- Checking Sharpness: A sharpened blade should be able to easily shave paper.
- Balancing is Crucial: After sharpening, it is essential to balance the blades as described in Step 6. An unbalanced, sharpened blade can cause more harm than good.
- Reinstall Blades: Once sharpened and balanced, reinstall the blades onto the mower, following the installation steps above, ensuring proper torque.
Common Zero Turn Mower Blade Maintenance Tips
Regular zero turn mower blade maintenance extends the life of your blades and your mower, ensuring optimal performance.
- Inspect After Hitting Obstacles: Always check your blades for damage after hitting rocks, roots, or other hard objects.
- Clean After Each Use: Remove grass clippings and debris from under the deck after each mowing session. This prevents buildup that can clog the deck and affect airflow.
- Check for Straightness: Periodically check if your blades are bent. A bent blade can cause severe vibration and damage to the spindle and engine.
- Replace Damaged Blades: Never try to straighten severely bent or cracked blades. Always replace them with new ones.
- Keep Blades Sharp: As discussed, sharp blades make for a cleaner cut and put less strain on your mower’s engine.
Frequently Asked Questions About Zero Turn Blade Changes
Here are some common questions people have about changing mower blades on a zero turn.
Q1: How often should I change the blades on my zero turn mower?
A1: The frequency depends on usage. For average homeowner use, replacing blades every 1-2 mowing seasons or when they show significant wear, nicks, or damage is typical. Sharpening them regularly can extend their usable life.
Q2: Can I use a regular wrench to tighten the blade bolts?
A2: While you can initially loosen and tighten the bolts with a regular socket wrench, using a torque wrench is highly recommended. Over- or under-tightening can cause serious issues.
Q3: What happens if my zero turn mower blades are unbalanced?
A3: Unbalanced blades cause excessive vibration. This vibration can lead to premature wear on the mower deck, spindle bearings, and even engine components, potentially causing costly damage over time. It also results in a poor quality cut.
Q4: Do I need to change all the blades at once?
A4: It’s best practice to replace all blades at the same time. Using blades with different levels of sharpness or wear can lead to an uneven cut and put uneven stress on the mower’s drive system.
Q5: My blade bolt is stuck. What should I do?
A5: First, ensure you’re turning it in the correct direction (counter-clockwise to loosen). If it’s still stuck, apply a penetrating oil like WD-40 and let it sit for 15-30 minutes (or longer for very stubborn bolts). Then, try again. If it’s extremely seized, you may need a breaker bar or consider professional help to avoid damaging the spindle.
Q6: Are there specific types of blades for different mowing conditions?
A6: Yes, there are. High-lift blades are good for bagging or mulching in thick grass, while low-lift or standard lift blades are often better for general mowing and side-discharging in less dense conditions. Always consult your owner’s manual or blade manufacturer for recommendations.
By following these detailed steps and maintenance tips, you can confidently perform a zero turn mower blade change, ensuring your mower runs efficiently and your lawn looks its best. Remember, safety first, always!